Friday, April 22, 2011

Chicken Schnitzel-Who Says Comfort Food Is Bad For Health!;-)


What does one do when one is a foodaholic and can’t resist something crunchy, spicy and meaty?? Well, being a weight watcher has its pitfalls...who am I kidding? There are ONLY pitfalls when every time you sink your teeth into a juicy steak or a crispy burger you see calories flashing in front of your eyes like one of those slot machines hitting jackpot!!:-(
So, I thought to myself, what can I cook that shouldn’t make my tummy ache with guilt afterwards and still leaves my taste buds tingling with joy!! Hmmm...it was hard to crush the images of KFC’s fried chicken till I realised that cooking isn’t rocket science! I could make my version of fried chicken without it being laden with fats and a guilt conscious!
Schnitzel is basically any meat beaten till thin, breaded and fried..it can be made with any kind of meat like veal, pork, chicken etc.
I decided to give this simple dish a try as my Saturday night T.V dinner, and my version definitely didn’t make me break into hives over the dreaded “C” word...CALORIES!!;-)
Here goes my contribution towards healthy and delicious Comfort food!:-)

CHICKEN SCHNITZEL
Difficulty Level- Easy
Preparation Time: 10 minutes
Cooking Time: 10 minutes
INGREDIENTS-
250 gms boneless chicken breast
1/4 cup wheat flour
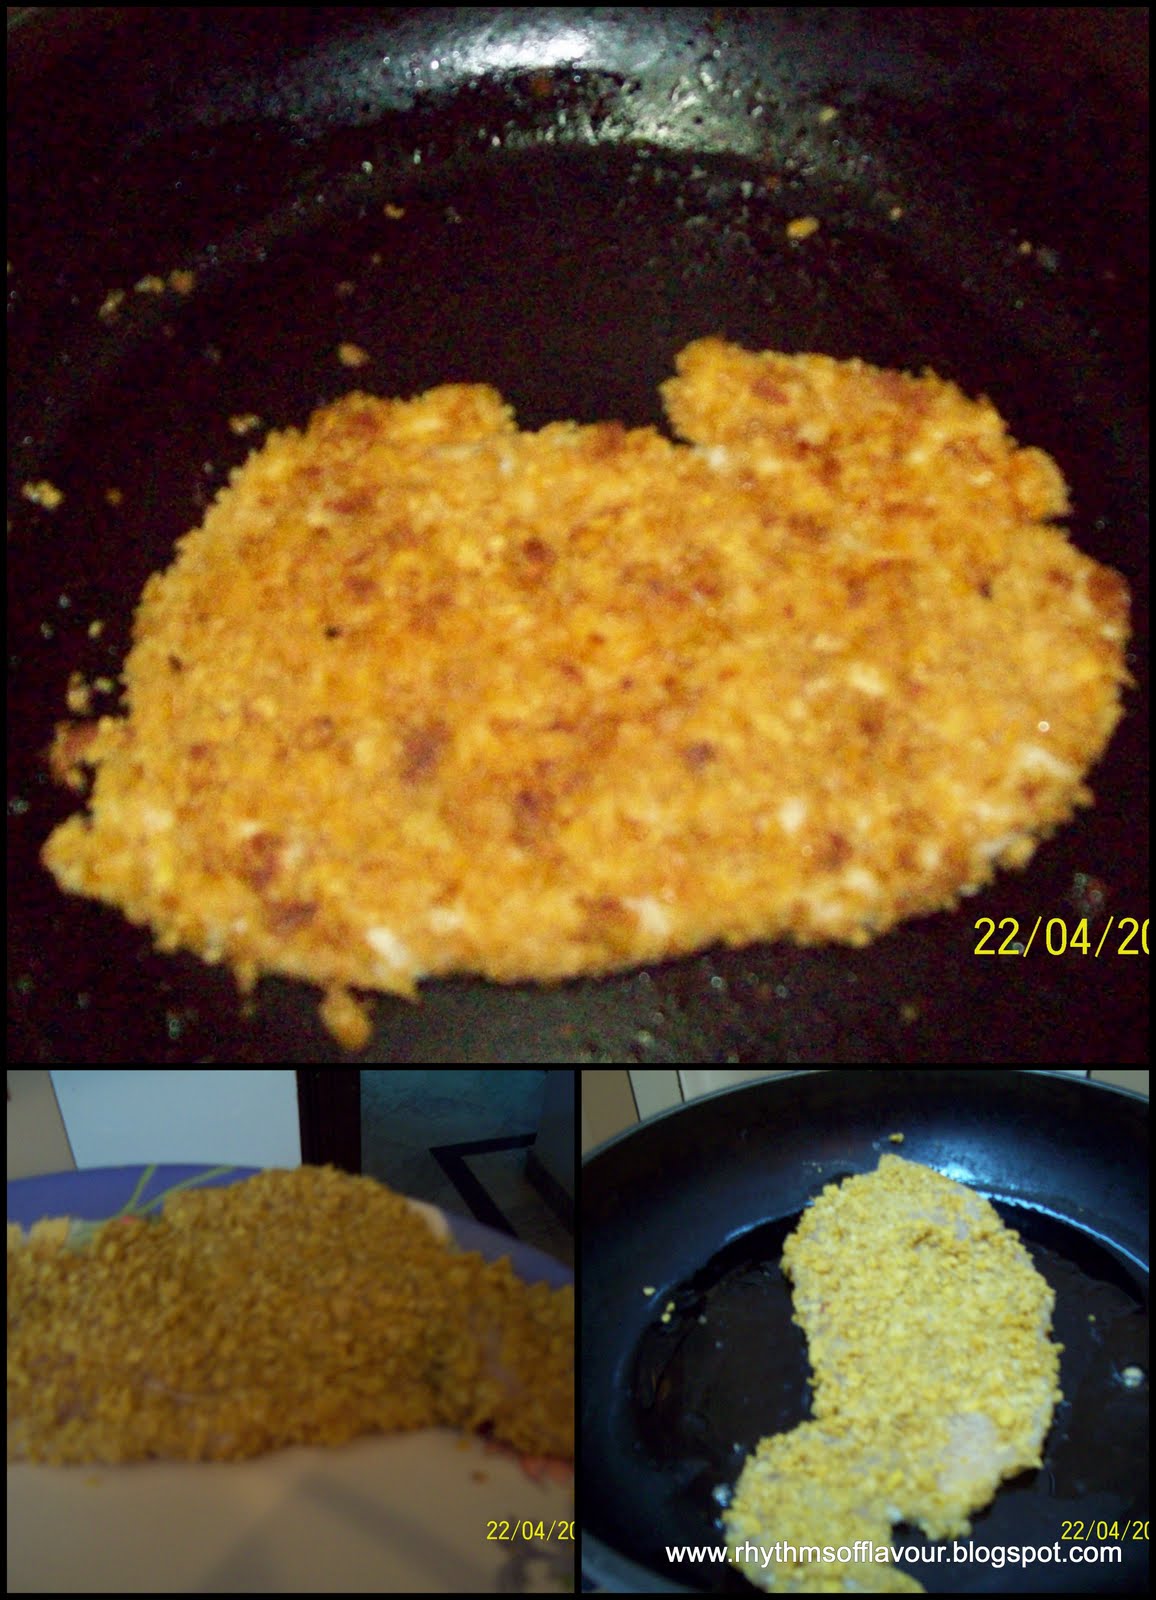
2 cups crushed cornflakes [bread crumbs can also be used but I find cornflakes give a crunchier skin]
2 eggs-lightly beaten
Salt, Pepper, Oregano, Chilli Flakes, Garlic Powder
3-4 tablespoons of Olive Oil [or any other cooking oil]
STEPS-
1. Cut each of the chicken breast horizontally.
2. Place each sliced piece of chicken between a piece of cling film and beat it till it has thinned out evenly. It is important to ensure that the chicken is thinned evenly so that it cooks equally and is not left raw or overcooked in places.
3. Rub the dry seasonings on the chicken pieces
4. Beat the eggs and the same seasonings to ensure that the crust once cooked has the same flavours as the chicken.
5. Coat each piece with flour. It is basically to ensure that the egg clings to the chicken when it is coated and doesn't slide off it.
6. After coating with flour, drench the chicken in the beaten egg mixture.
7.  Lastly, coat the chicken liberally with the cornflakes on both sides in a way that it is completely and evenly covered.
8. Refrigerate the coated chicken pieces for half hour.
9. In a shallow non stick pan, heat up olive oil and place each piece individually to ensure that they ate cooked well on all sides.

Serve with sautéed vegetables, pickles and Lebanese bread or just slide it between two slices of multigrain bread and enjoy!!:-)

Thursday, April 21, 2011

Chocolate Rum Balls For My Diaper Buddy’s Birthday!!

Shuchi & I go back 10 years now, having met during our MBA and have been friends ever since..from the time when I would get her handwritten notes Xeroxed a week before the exams to listening to her advice on men, life and love! She loves giving advice and well...since I seem to be perpetually in need of advice, it has been a well balanced relationship filled with secrets, hardcore bitching et all!:-)
April 19th being her birthday, I sat racking my brains for a dessert that would best define our friendship...something with deep flavours, a heady taste and as easy to make as the easy comradeship we share. Chocolate Tarts, Coffee Marble Cakes, Jelly Doughnuts and Cheesecakes flashed through my mind but somehow I just didn’t feel that any of it screamed “Happy Birthday to Shuchi”!!

Then it dawned to me...what better dessert to create for my bum chum but the nickname that she bestowed upon me few months back...RUM BALL!! Well, for other than the obvious reason, the nickname denotes my sarcastic, bitchy and spicy personality!! ;-)

Once the weight of deciding what to conjure up was taken off my head...the rest was easy! Found a recipe while goggling for it on the world wide web :-p
The best thing about it was that I didn’t have to do any heavy baking and if you have any kids, it’s a fun thing to engage them in the kitchen without being accused of promoting child labour. Of course, for the young ones you can add condensed milk or pineapple juice instead of rum.
All I needed was a handful of ingredients that most of us would have in our pantry and couple of minutes to prepare the rum balls. One should however make sure that these rum balls should be prepared atleast 3-4 days before you want to serve them as the rum needs time to get to know other fellow ingredients intimately to bring out the best in itself!!;-)
The end result was good enough as it put a smile on the birthday girl’s face when she bit into it!:-) And, more than her reaction, I was really touched by her mom’s SMS saying “Ur break has turned u into a great chef. Keep it up. Uncle too is amazed”.  That sms made my day!!!:)
 CHOCOLATE RUM BALLS

Level of Difficulty: Easy
Preparation Time: 10 minutes
Resting Time: 3-4 days
INGREDIENTS
For RUM BALLS-

3 ¼ cups Crushed Vanilla/Chocolate Wafers
¾ cup confectioners’ sugar
¼ cup unsweetened cocoa powder
1 ½ cups chopped cashews [or any other nuts]
3 tablespoons light corn syrup or honey
½ cup dark rum [I used Old Monk]

For ICING-
¼ cup melted white chocolate
¼ cup melted dark chocolate
¼ cup desiccated coconut [optional]
PROCEDURE-

1.       In a large bowl, stir together the crushed wafers, sugar, cocoa and nuts.
2.       Blend in the honey and rum.
3.       Shape the balls in round shapes as per the size you like and roll each of them in the confectioners’ sugar.
4.       Store them in airtight container in the refrigerator for minimum 2-3 days.
DECORATING THE RUM BALLS-
3-4 hours before serving, decorate the rum balls with the white and dark chocolate and coconut.
1.       Add the melted chocolates in 2 separate piping bags and make abstract designs on the top of the balls.
2.       You can also roll a few of the rum balls in coconut so that there is a variety of topping available.

ENJOY!!:-)